WordPress offers a lot of features to make websites both functional and aesthetically pleasing. One such feature, crucial for user experience and site architecture, is the WordPress navigation menu.
The navigation menu is important in guiding your site’s visitors, making information accessible, and improving overall website usability. In this blog, we will delve deep into what is WordPress navigation menu, why we need it, and how to add WordPress navigation menu.
Table of Contents
The navigation menu is a fundamental component of most websites, and WordPress offers a user-friendly way to create and manage these menus. Here’s a brief overview of what a navigation menu in WordPress is:
What Is a Navigation Menu in WordPress?
A navigation menu in WordPress is a set of links that guide users to different sections or pages of a website. These links can point to pages, posts, custom posts, categories, custom links, or even other websites. The navigation menu is usually placed in the header of a website, but it can also be found in footers, sidebars, or any other widget area.
Why Should You Add a WordPress Navigation Menu in Posts / Pages?
The addition of navigation menus within individual posts and pages is more than just a design choice; it has several significant benefits:
- Enhanced User Experience: Navigation menus guide visitors through your website, making information easily accessible. This leads to a more enjoyable and streamlined user experience.
- Improved SEO: Structured navigation helps search engines understand the content and structure of your website better. This leads to better indexing and can improve your site’s search engine rankings.
- Increased Engagement: By providing related links and content through navigation menus, you can increase user engagement and encourage visitors to explore more of your site, thus reducing bounce rates.
- Professional Aesthetics: A well-designed navigation menu adds to the professional appearance of your site, reflecting a cohesive and thought-out user interface.
Method 1 – Add a Navigation Menu in WordPress Using WordPress Navigation Block
A WordPress navigation menu can enhance the user experience by providing easy access to key content. By using the built-in Navigation block, users can effortlessly insert a navigation menu into any post or page. While this method offers granular control over the placement and content of menus, it may be time-consuming if applied to multiple pages.
This method outlines the procedure to incorporate a navigation menu seamlessly and personalize it to fit individual post/page requirements.
Let’s start it!
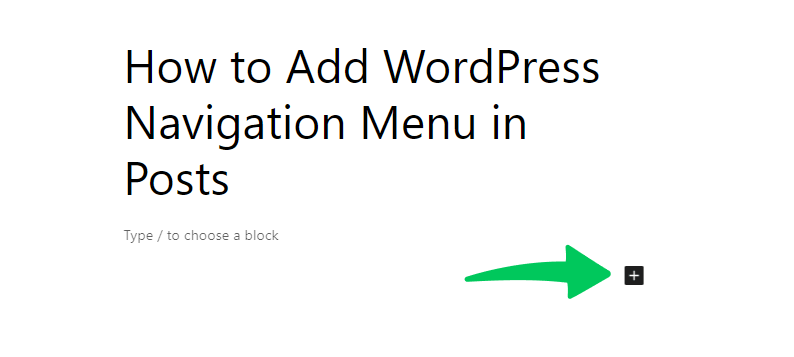
Step 1: Start with a New Block
Open the desired page or post where you want to add the navigation menu.
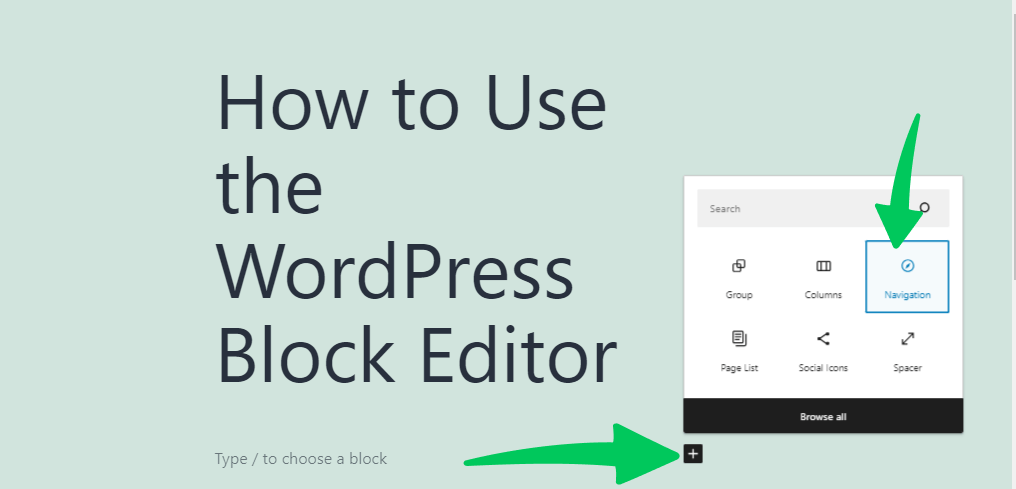
Click the + button to introduce a new block.
Step 2: Insert the Navigation Block
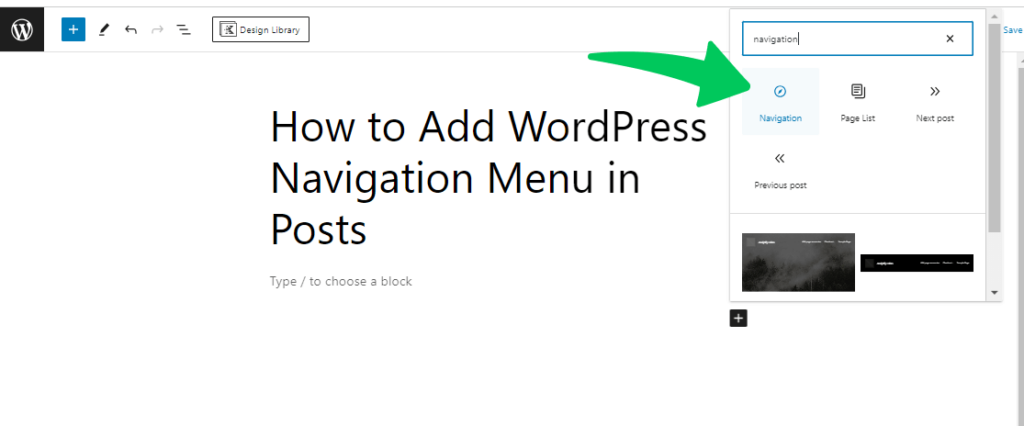
In the pop-up search bar, type Navigation.
Click on the navigation block that appears to add it to your page or post.
Step 3: Select Your Menu
By default, the Navigation block will display one of your existing menus.
To select a different menu, click on the Block tab.
- Add Links to the Menu:
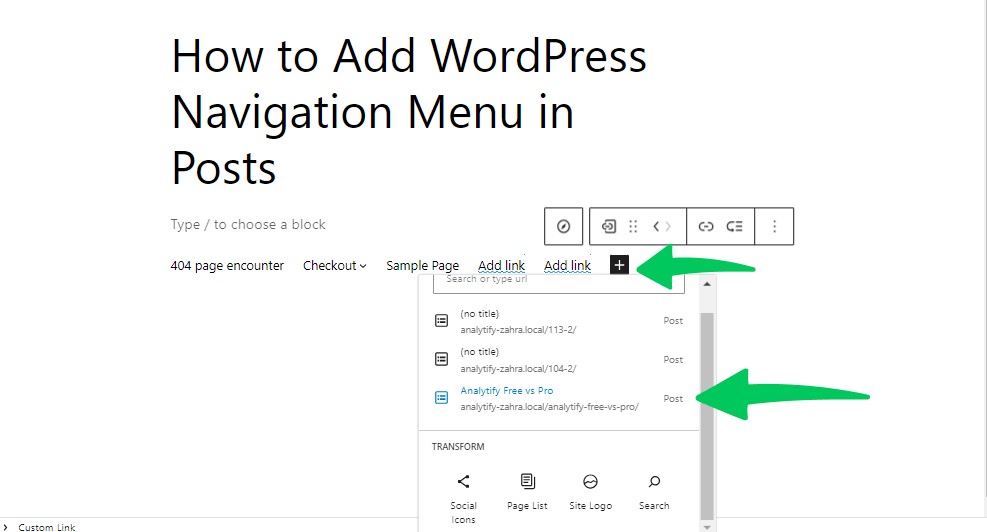
In the List View tab, click on the + icon.
A popup will appear; select Page Link.
Choose a page from the dropdown or type in the desired page title.
Click on the correct page when it appears to add it to the menu.
Repeat the process to add multiple links.
- Include Social Icons:
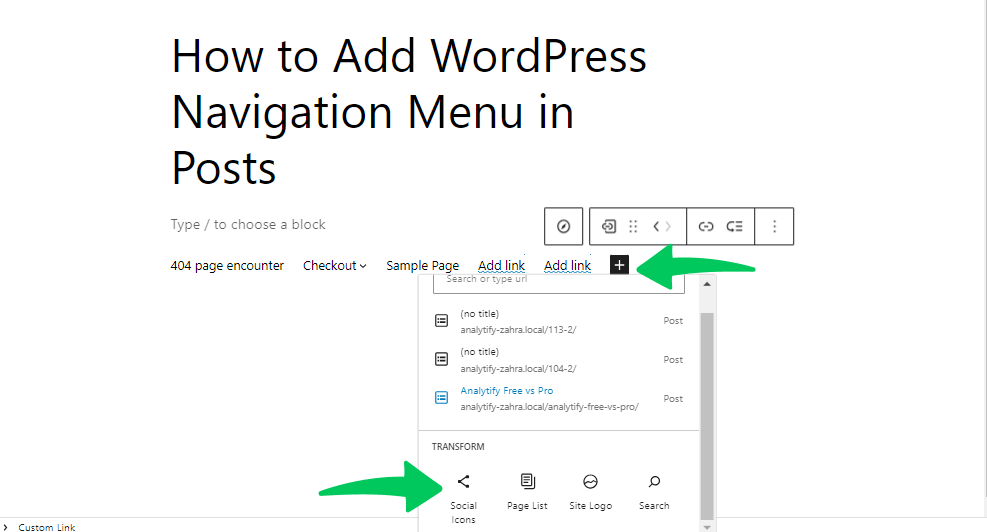
In the List View tab, click on the + icon.
Select Social Icons.
In the new section, click on + plus to add.
Choose the desired social media network.
Configure the social icon by selecting it and typing in your social media profile URL.
Repeat to add multiple social icons.
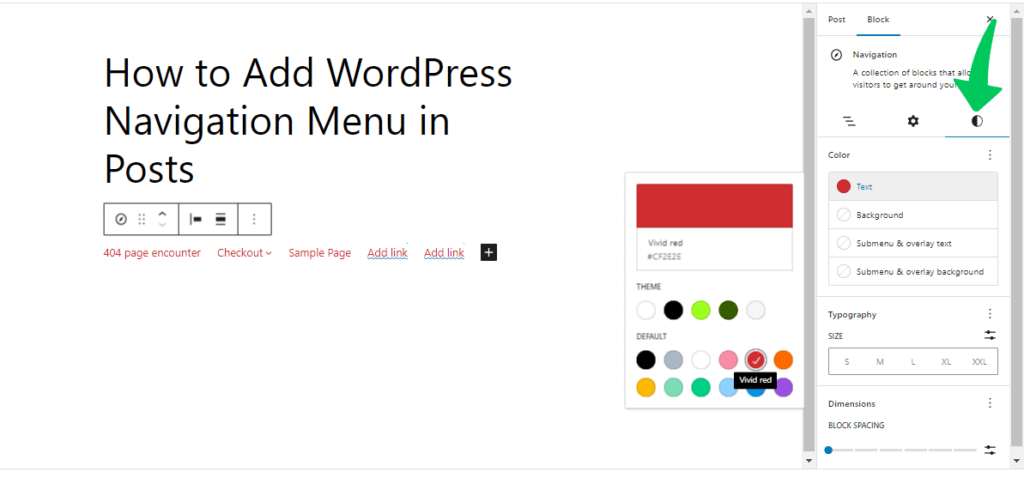
Step 4: Styling Your Menu
Click on the Settings tab to adjust the layout, such as alignment and orientation.
Select the Styles tab to modify the visual appearance (colors, typography).
Observe changes in the live preview as you adjust settings.
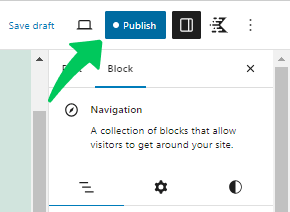
Step 5: Publish or Update Your Menu
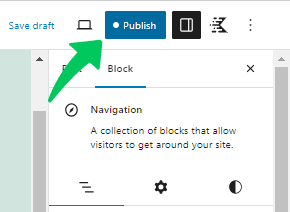
Once satisfied with your menu, click either the Update or Publish button.
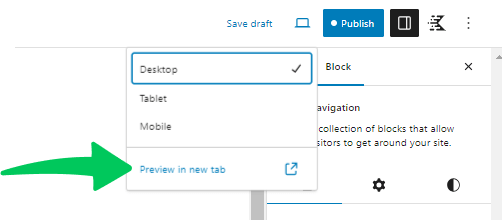
Step 6: Preview Your Menu
Visit the page or post to see the navigation menu live.
This guide will help you set up and customize a navigation menu on your WordPress page or post. Adjust according to your specific needs and preferences!
Method 2 – Adding a Page to a Menu From WordPress Dashboard
You can also add WordPress navigation menu from the WordPress admin dashboard. WordPress gives you control over your menu’s appearance. Let’s explore it.
Step 1: Dashboard Navigation
Log in to your WordPress dashboard.
Hover over Appearance and click on Menus.
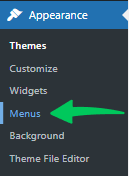
Note: If you don’t find the Menus option in Appearance, you’ll need to select any compatible theme, i.e., Twenty Twenty, Twenty Twenty-one, etc.
Step 2: Create a New Menu
Click on the Create a New Menu link.
Give your menu a name (e.g., Main Menu) and click Create Menu.

Step 3: Adding Items to the Menu
On the left side, you can add pages, posts, custom links, and categories.
Choose what you want to add, select it, and then click Add to Menu.

Step 4: Organizing the Menu
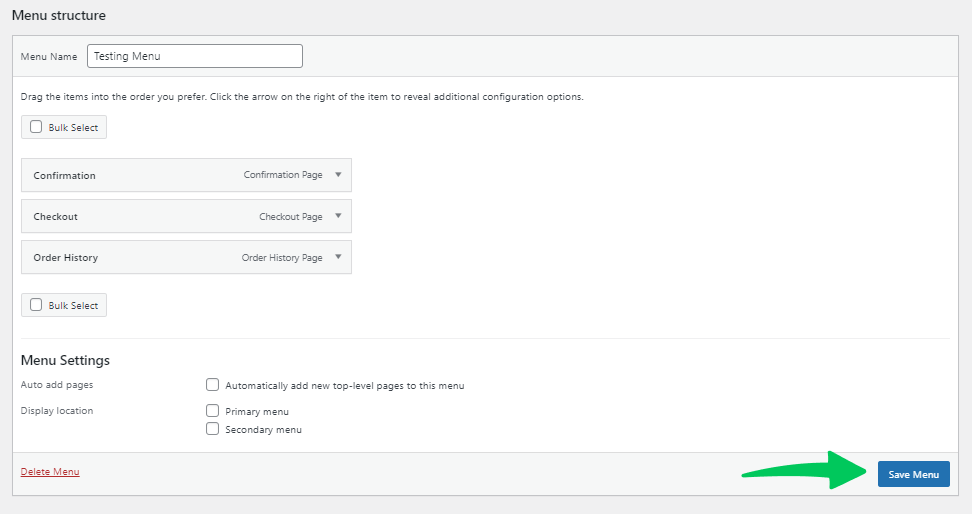
Once the items are added, you can drag and drop them to rearrange them.
If you want to create a dropdown menu, just drag the item slightly to the right under another item.
Then, click on Save Menu to save it.
Step 5: Inserting the Navigation Menu into Posts/Pages
Navigate to the page or post where you want the menu.
Click on the Add Block button.
Choose Navigation Menu from the available blocks.
Select the menu you created from the dropdown.
Step 7: Publish or Update
Don’t forget to update or publish your post/page after adding the menu.
Final Thoughts
WordPress makes adding and managing navigation menus in posts and pages relatively straightforward. This feature greatly enhances the overall usability of the platform, making it easier for users to navigate through content and find what they are looking for. With WordPress, creating and organizing navigation menus becomes a straightforward process, ensuring a seamless and intuitive user experience.
In this article we have discussed and explained two methods to provide you with the necessary information on how to add a WordPress navigation menu in your posts and pages. By following the steps outlined, you can easily enhance the navigation experience for your website visitors. Whether you are a beginner or an experienced WordPress user, incorporating a navigation menu will undoubtedly improve the overall user experience and make it easier for your audience to navigate through your content.
We hope this blog helped you to know how to insert navigation menu in WordPress
Frequently Asked Questions
Can I add the same navigation menu to multiple pages using the WordPress Navigation Block?
Yes, you can use the Navigation Block on as many pages and posts as you like and even reuse an existing menu.
Is the Full Site Editor available for all WordPress themes?
No, the Full Site Editor is designed for block themes created specifically to utilize this feature. Check if your theme supports it, or look for compatible themes.
Do I need coding knowledge to create a custom WordPress theme?
Creating a custom theme generally requires a good understanding of HTML, CSS, and PHP. It’s a more advanced method best suited for developers or those with some coding experience.
Can I use a plugin to add a navigation menu?
Several plugins allow you to create and manage navigation menus, some even providing additional features and customizations beyond the standard WordPress functionality.
How do I make sure my navigation menu is mobile-friendly?
Many themes and methods for creating navigation menus are designed to be responsive for mobile devices. You can test your menu on various screen sizes and utilize CSS media queries if necessary to adjust the design for mobile.
Can I track how users interact with my navigation menu?
Yes, tools like Analytify can help you understand how users are interacting with your navigation menu. This insight can guide further optimization and design decisions.
Leave a Reply